macOS 简易手册
计划每天用一些零碎的时间,写一份 macOS 的手册。
基础设置
安装系统
macOS 的系统很好安装,目前新买任何 Mac 设备,比如MacBook,MacBook Air,MacBook Pro,Mac mini,iMac 和 Mac Pro,都自带 macOS,可以在系统里通过 Appstore 下载最新系统升级到最新系统。 当然,你也可以重新安装系统。
操作方式
开机,按住 Option 键,然后可以选择安装方式,即便你没有安装盘,你也可以通过网络安装系统。
忘记系统密码
如果你在账户里绑定了 Apple ID,你可以通过那个找回密码,如果实在不会了,你也可以开机,按住 command+R,选择终端,输入 resetpassword,回车,选择账户,输入新密码,即可重置密码。
系统的设置
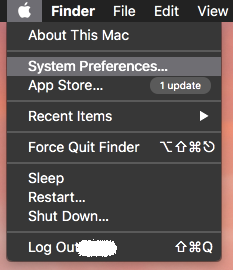
按自己的习惯,进行一些设置。在系统的主界面,点击左上角的苹果图标,选择系统设置,即可进入到系统的设置界面。如图
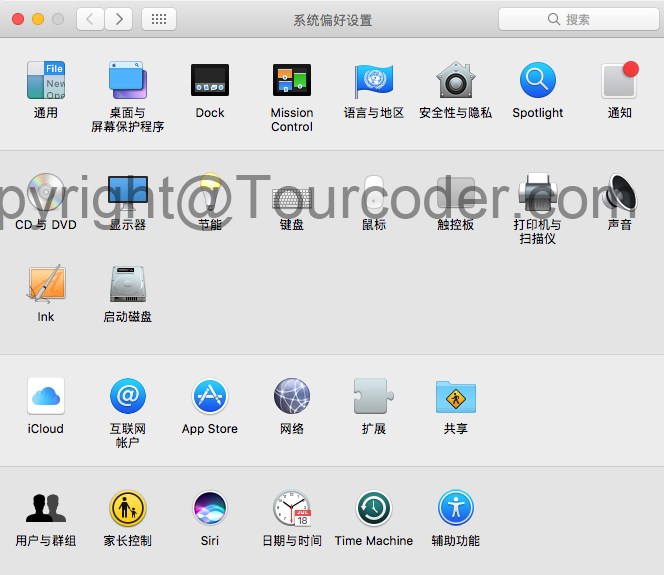
这里是系统设置的内容都在这里,因为我当前是在虚拟机的 macOS 里截图,有些内容显示不太一样,但不妨碍。
语言设置
刚进入系统,语言默认是英文的,点击设置界面的 Language & Region,点左边下面的 + 号,在弹出的列表中选择简体中文,然后将简体中文拖到 English 上面。如图
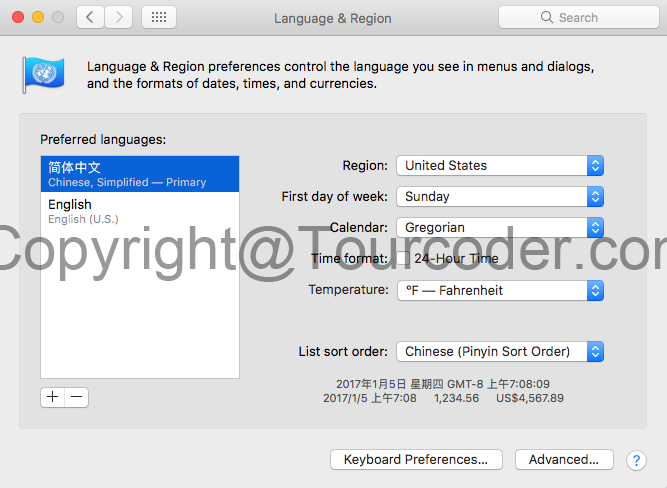
这时点返回按钮,会提示你是否要重启,选择重启电脑,在重启完成后,你就进入中文界面,依旧点击左上角的苹果图标,进入设置界面。
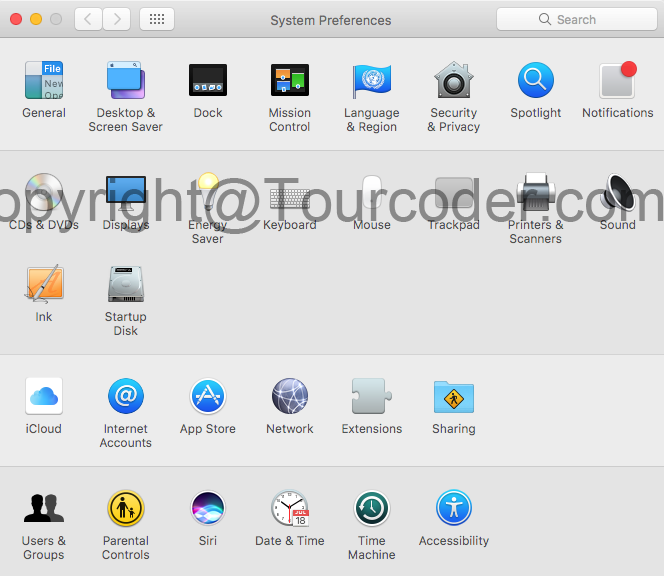
这里的每一个设置的内容都描述的很清楚,我不一一讲解,可以按自己的自由习惯去设置,我只说一些通用的设置。
给电脑起名
我很喜欢给我的电子设备起名,给这些设备起名是件很有趣的事情,点击上图系统偏好设置中的共享,这里的电脑名称默认是你的用户名's Mac**,我将它改名成了 Feb,为啥叫这名,好记。
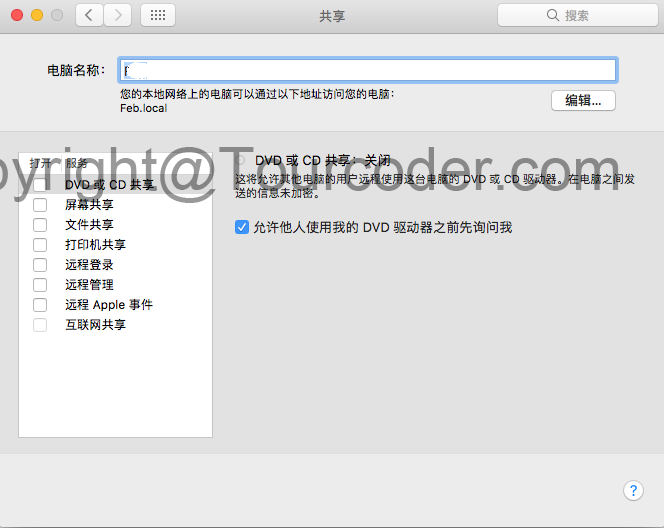
这里是计算机名字,也可以通过命令行解决,在终端中输入
sudo scutil --set ComputerName 计算机名
但这不能够更改终端中显示的名称,终端中显示的是主机名 HostName,可以在终端中输入命令
sudo scutil --set HostName 主机名
重启终端即可完成修改。
安全性与隐私
这里主要牵涉到的一个设置是安装网上下载的第三方应用,点击系统偏好设置里的安全性与隐私,即可进入下图界面
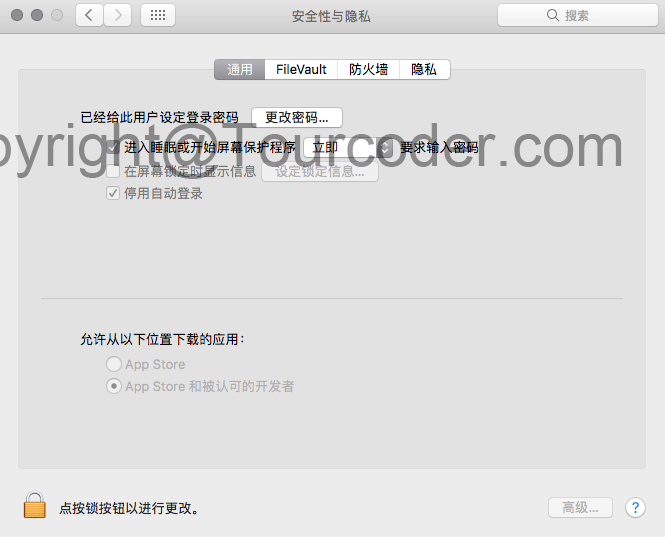
注意系统的改变
在 macOS 10.12 之前,允许从以下位置下载的应用下面是三个选项,还有一个允许任何来源的选项,点击左下角的锁按钮解锁,然后选择这个选项即可。但 macOS 10.12 开始,这个选项被隐藏,可以通过终端命令显示出来。
点右上角的搜索放大镜,在弹出的窗口中输入终端
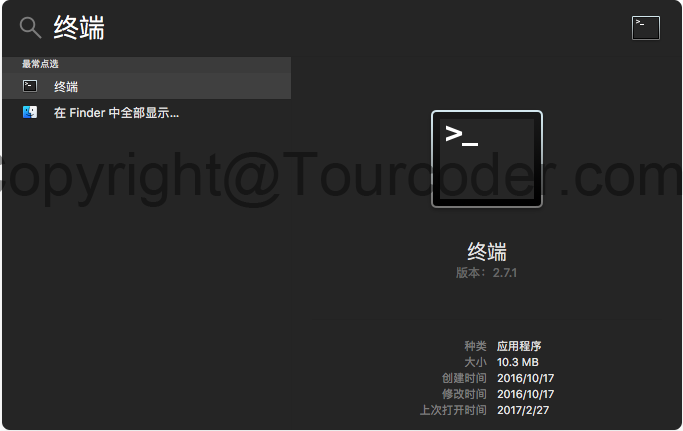
双击终端,在弹出的终端界面中输入 sudo spctl --master-disable

回车,这里会需要你输入密码,输入密码后,再系统偏好设置,隐藏的那个选项回来了。
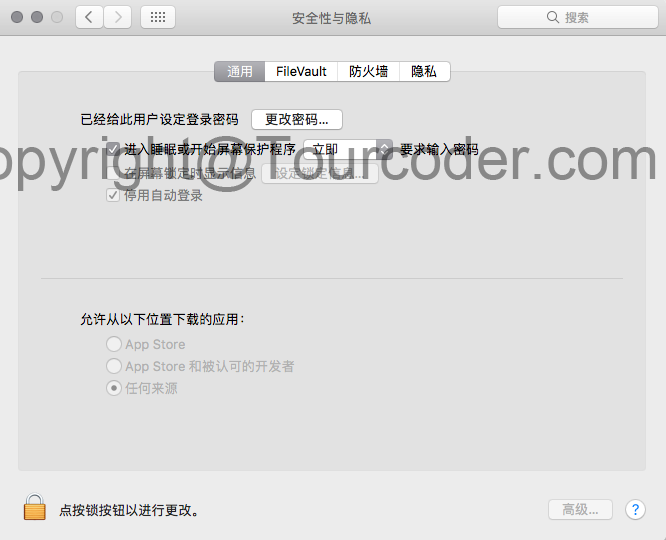
选择这个选项,你就可以使用任何网上下载的应用了。
请务必开启这里的 FileVault,不开启,如同裸奔
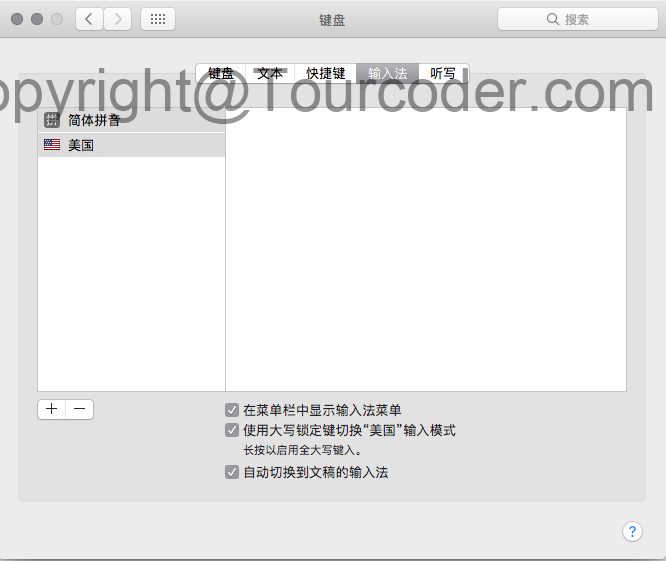
输入法
至今为止,我们还是只能输入英文,那么如何输入中文呢?依旧是进入系统偏好设置,点击里面的键盘,然后同样是点击左下角的 + 号,选择中文输入法即可,当然你也可以选择其他你需要的输入法。
快捷键
有了两个输入法,自然想通过键盘实现快速切换,同样系统偏好设置里点键盘,选择快捷键 - 输入法,勾选对应的内容即可。
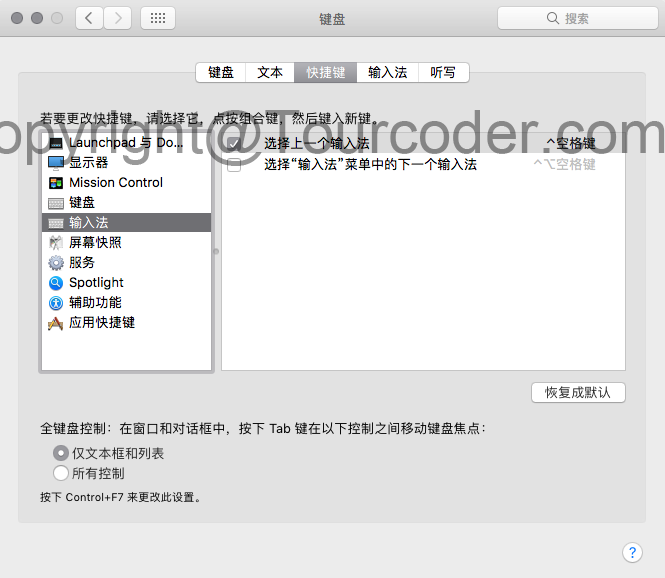
这样我可以自由的通过键盘切换输入法了。
注意:有的人是用的第三方输入法,自行研究
安装软件
因为 app 的兴起,基本现在软件都被叫着应用,即 app 了。安装软件的方法也很简单。
-
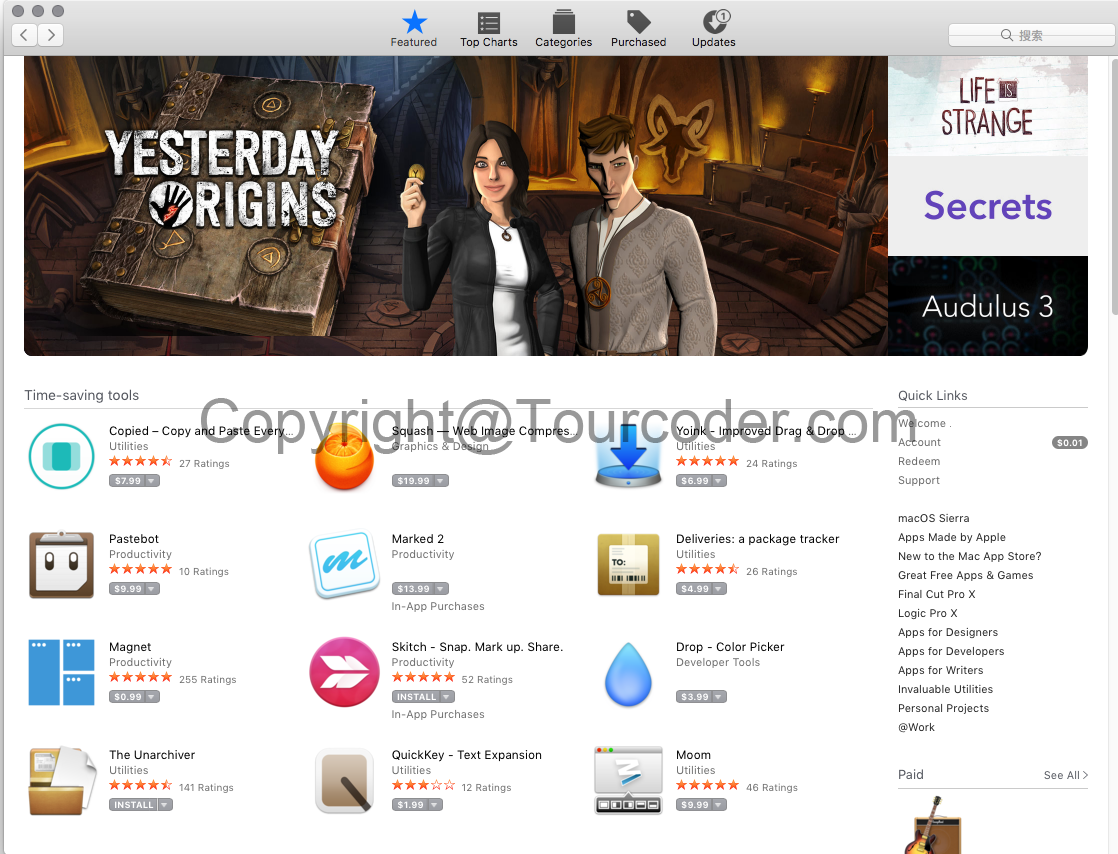
从 App Store 上下载
点击左上角的苹果图标,选择 App Store,即可在里面下载你要想要的软件。
-
从网上下载
有些软件并没有上线到 App Store,那么你需要在网上下载,通常得到的是一个后缀为 dmg 的文件,双击该文件,然后将文件里的应用文件直接拖入到应用程序这个文件夹中即可。
当然绝大部分软件,都会有提示告诉你如何拖入到应用程序这个文件夹中。比如 qq,下载后得到的 dmg 文件,双击该文件同意后,出现下图界面。
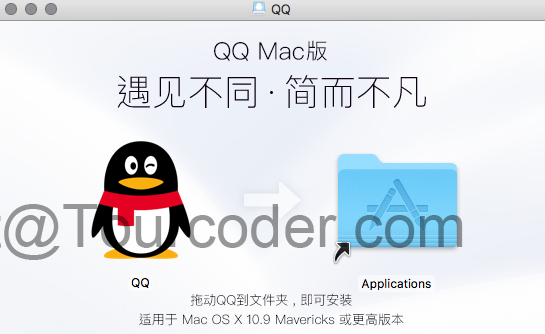
这么简单的提示,相信大家都能懂。
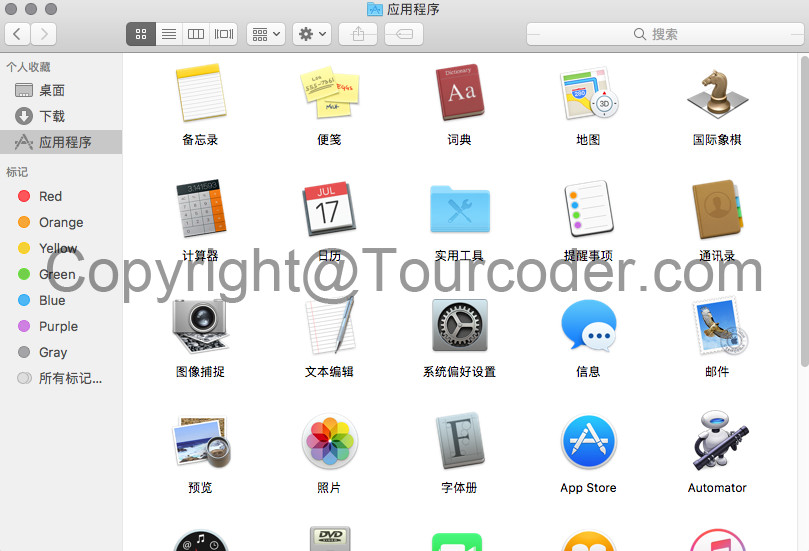
卸载软件
卸载软件更简单,比如我要卸载日历这个软件,进入应用程序这个文件夹,在日历这个软件上点右键,选择移到废纸篓即可。
也有人会说就这么简单吗?是的,这么简单!当然,如果你和我一样是个清理强迫症患者,你还可以去下面的地方清理掉缓存和残留文件
~/Library/Application Support/(你所卸载的软件名称)
~/Library/Preferences/(你所卸载的软件名称)
~/Library/Caches/(你所卸载的软件名称)
具体方法,在终端中进入上面的目录,删掉这些内容即可,不过这个真没有必要。
另外需要记住的一句通俗的话是所有的菜单都会出现在顶部的菜单栏中,所有的 Dock 上的图标都可以理解为一个快捷方式。
还有一些内容就不一一说明,macOS 其实很简单很傻瓜,非常稳定,一旦用上了,就很难再离开,它能帮你节省很多折腾的时间,专心于电脑使用的目的。
Tips:在终端中输入 softwareupdate -i -a 可以帮你升级软件哟
基础开发环境

相信不少人见过这张图,具体事什么地方的场景不知道,但觉得每一个程序员都应该有一台 Mac 做开发,哪怕你是做 dotNet 开发的人。推荐的理由也很简单,Mac 系统和它的硬件体验真的太好了,省事,能让你安心于自己的工作内容,减少了很多折腾的时间。
所以,手册的第二部分,就写 macOS 下常规开发环境的配置,需要说明的是用到的开发软件自然也是开发环境的一部分。
Xcode
iOS / Mac 上应用的开发工具,写这篇手册的时候,当前 Xcode 版本是 8.2,可以在 App Store 上下载到,同时 Xcode 的命令行工具,在以后的开发中经常用到,安装方式,打开终端,输入
xcode-select --install
回车,即可安装完成。
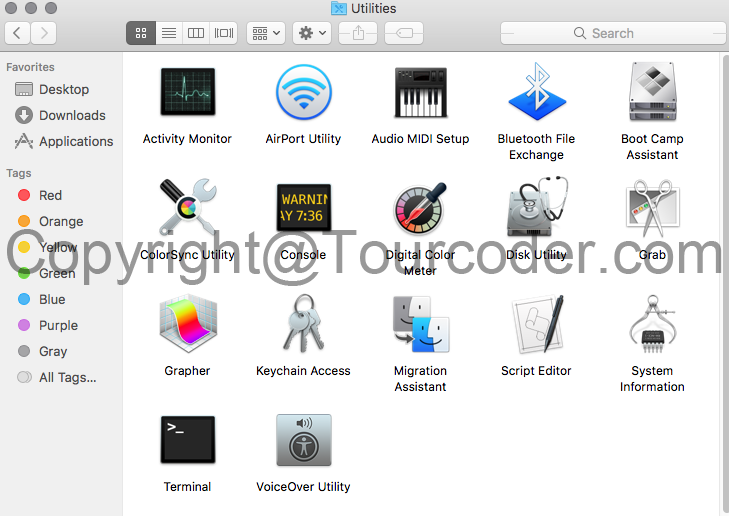
终端 (Terminal)
Terminal,中文名叫终端,又叫命令行应用,这是一个神器,在以后很多时候,你都会用到它,尤其是喜欢命令行的人。
它的位置:应用程序文件夹里面 Utilities 文件夹里。
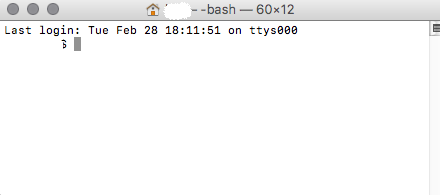
双击它,即可打开,界面如下
因为以后会多次用到它,所以把它锁定在 Dock 上,在 Dock 上的终端上点右键,选择选项->保留在 Dock。
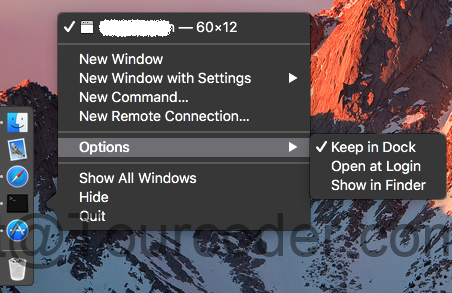
这样,你可以随时点 Dock 上的终端图标打开它了。
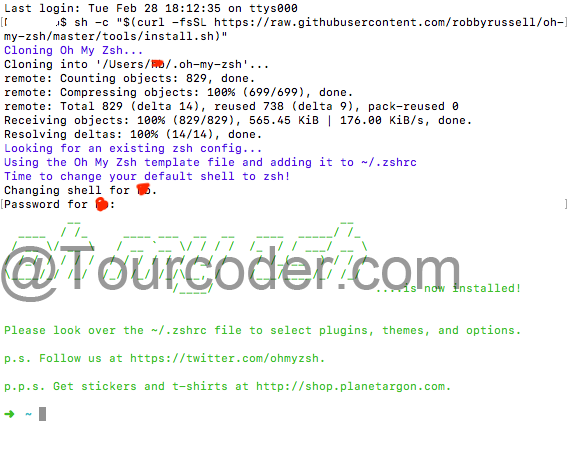
因为以后长时间用到它,所以让它更强大点,使用 Oh my zsh,让它变得更好,我之前的博文也有简单提过。
打开终端,输入
sh -c "$(curl -fsSL https://raw.githubusercontent.com/robbyrussell/oh-my-zsh/master/tools/install.sh)"
中途会要求你输入密码,完成后就可以出现下面的界面。
继续在终端里输入 vi ~/.zshrc,即可编辑它的配置文件,具体配置颜色等,请看它的官网 http://ohmyz.sh/,我配置后的效果如下
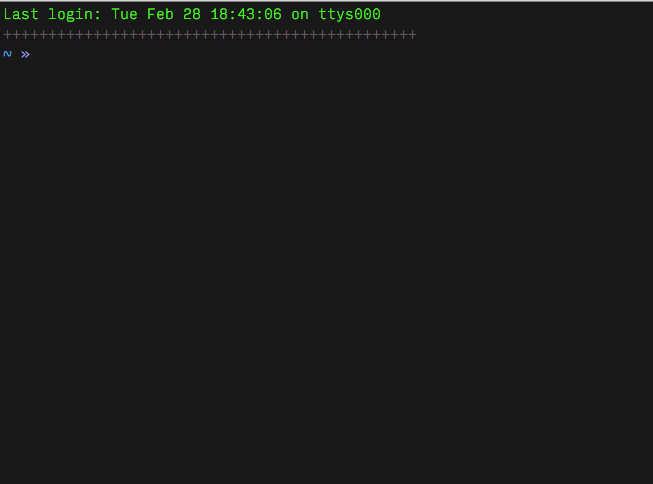
我的配置可以去看这篇博文,设置截图如下
更新 ZSH,直接在终端中输入 upgrade_oh_my_zsh,有时候会提示
Updating Oh My Zsh
error: cannot pull with rebase: You have unstaged changes.
error: please commit or stash them.
There was an error updating. Try again later?
进入到 zsh 所在目录
cd ~/.oh-my-zsh
处理下 git 的内容,然后更新即可。
Homebrew
简单点说,Homebrew 就是一个软件包工具,它能让你更方便的管理和使用 macOS 上的软件以及一些开发用到的类库。它的官方站点是 http://brew.sh
安装
/usr/bin/ruby -e "$(curl -fsSL https://raw.githubusercontent.com/Homebrew/install/master/install)"
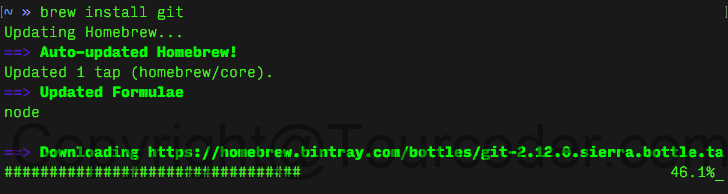
在终端中输入上面代码,回车,等待一会安装完成,安装过程中,它会需要到你的密码,如图
 ,有时候会遇到速度慢的问题,可以查看这篇文章。
使用
Homebrew 的使用命令也极其的少,在终端中输入 brew help,即可查看它的常规使用等,如下图

命令也非常简单,比如
brew install xxx
安装某个包,其中 xxx 是这个包的名字。
brew update <xxx>
更新,如果后面跟上 xxx 表示更新该名称的包
brew outdated
检查是否有包需要更新
brew list --versions
列出我们安装了哪些包,并带有版本的显示,这个时候你会发现随着升级,有不少旧的包,基本不会再使用,那么通过下面的命令清理干净。
brew cleanup
Cask
既然 Homebrew 能安装包了,能否安装软件呢,答案是肯定的,用 Homebrew Cask 在终端中,可以一条命令安装软件,在另外一个方面解决了 App Store 下载慢,经常下载不下来的问题。
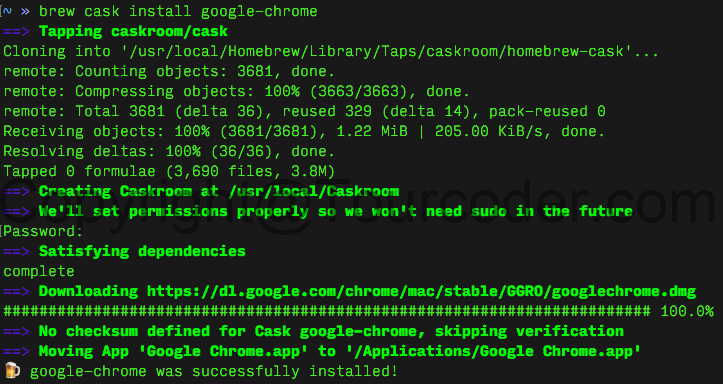
比如我通过 brew cask install google-chrome 命令安装了 Google Chrome 浏览器,瞬间完成。
注意命令执行的第一条 Tapping caskroom/cask,它是获取 cask,在你执行安装的时候,如果你的系统中没有 cask,它会先自行获取,如果你想自己获取,可以通过命令 brew tap caskroom/cask 获取即可。
目前并不是所有的软件都能通过它来安装,能力足够的话,你也可以贡献软件库,http://caskroom.io/ 是他的官网,https://github.com/caskroom/homebrew-cask 是它的开源地址。
Git
如果一个程序员到现在还没掌握代码版本控制流,这是一件很危险的事情。
这是我说的话,嘿嘿。在版本控制中,我首推 Git,也建议大家都能使用 Git 而非其他。
安装
可以直接用上一段说到的工具 Homebrew 来安装,其实安装 xcode 命令行工具的时候已经安装了,是属于系统自带的版本,版本常常较低,通过下面命令完成安装升级。
sudo mv /usr/bin/git /usr/bin/git-apple //备份 git,此步也可以省略通过下面的 brew link git 来关联
brew install git //安装 git
brew link git //关联 git
brew update && brew upgrade //更新升级
稍等一会,即可安装完成。
git --version 查看当前 Git 的版本
which git 查看当前 Git 的位置,通常应该是 /usr/local/bin/git
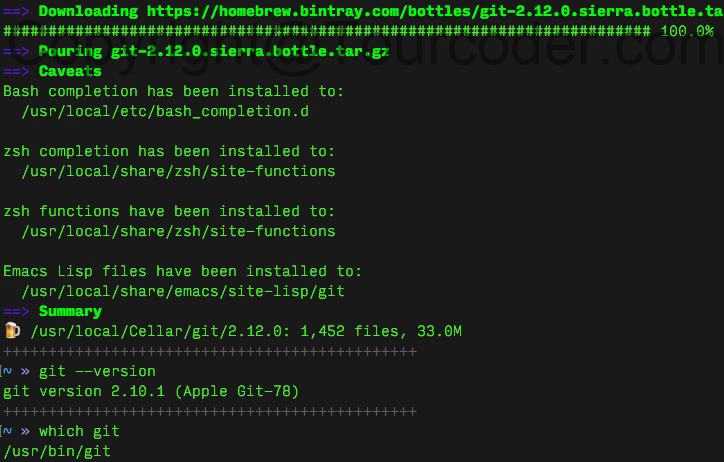
注意,我这里显示的 git 信息并不是由 brew 安装而来,有时候显示的还是旧的版本,其实是需要更新下,编辑 ~/.zshrc 文件,因为我用的是 zsh,默认是编辑 ~/.bash_profile,具体是看使用的是哪个 shell。
export PATH=$(brew --prefix)/bin:$PATH
在文件尾部,增加一行上面的内容即可。加在尾部的原因是尾部的权限最重。
使用
至于 Git 的更多用法,强烈建议去 https://git-scm.com 系统的学习一下。
小贴士
gitignore 文件是个很好的东西,可以让你不同步项目中你不想同步的内容,比如 macOS 下自带的 .DS_Store 等,在项目的根目录下创建 .gitignore,内容是
.DS_Store
.DS_Store/
那么这些内容就不会同步到代码库中了。
我常用的 .gitignore 文件的内容
#macOS

*.DS_Store
.AppleDouble
.LSOverride

###Icon must end with two \r
Icon


###Thumbnails
._*

###Files that might appear in the root of a volume
.DocumentRevisions-V100
.fseventsd
.Spotlight-V100
.TemporaryItems
.Trashes
.VolumeIcon.icns
.com.apple.timemachine.donotpresent

###Directories potentially created on remote AFP share
.AppleDB
.AppleDesktop
Network Trash Folder
Temporary Items
.apdisk

#Windows
###Windows thumbnail cache files
Thumbs.db
ehthumbs.db
ehthumbs_vista.db

###Folder config file
Desktop.ini

###Recycle Bin used on file shares
$RECYCLE.BIN/

###Windows Installer files
*.cab
*.msi
*.msm
*.msp

###Windows shortcuts
*.lnk

#Xcode

###Build generated
build/
DerivedData/

###Various settings
*.pbxuser
!default.pbxuser
*.mode1v3
!default.mode1v3
*.mode2v3
!default.mode2v3
*.perspectivev3
!default.perspectivev3
xcuserdata/

###Other
*.moved-aside
*.xccheckout
*.xcscmblueprint

#sublimetext
###cache files for sublime text
*.tmlanguage.cache
*.tmPreferences.cache
*.stTheme.cache

###workspace files are user-specific
*.sublime-workspace

###project files should be checked into the repository, unless a significant
###proportion of contributors will probably not be using SublimeText
###*.sublime-project

###sftp configuration file
sftp-config.json

###Package control specific files
Package Control.last-run
Package Control.ca-list
Package Control.ca-bundle
Package Control.system-ca-bundle
Package Control.cache/
Package Control.ca-certs/
Package Control.merged-ca-bundle
Package Control.user-ca-bundle
oscrypto-ca-bundle.crt
bh_unicode_properties.cache

###Sublime-github package stores a github token in this file
###https://packagecontrol.io/packages/sublime-github
GitHub.sublime-settings

#Vim
###swap
[._]*.s[a-v][a-z]
[._]*.sw[a-p]
[._]s[a-v][a-z]
[._]sw[a-p]
###session
Session.vim
###temporary
.netrwhist
*~
###auto-generated tag files
tags

#Nodejs
###Logs
logs
*.log
npm-debug.log*
yarn-debug.log*
yarn-error.log*

###Runtime data
pids
*.pid
*.seed
*.pid.lock

###Directory for instrumented libs generated by jscoverage/JSCover
lib-cov

###Coverage directory used by tools like istanbul
coverage

###nyc test coverage
.nyc_output

###Grunt intermediate storage (http://gruntjs.com/creating-plugins#storing-task-files)
.grunt

###Bower dependency directory (https://bower.io/)
bower_components

###node-waf configuration
.lock-wscript

###Compiled binary addons (http://nodejs.org/api/addons.html)
build/Release

###Dependency directories
node_modules/
jspm_packages/

###Typescript v1 declaration files
typings/

###Optional npm cache directory
.npm

###Optional eslint cache
.eslintcache

###Optional REPL history
.node_repl_history

###Output of 'npm pack'
*.tgz

###Yarn Integrity file
.yarn-integrity

###dotenv environment variables file
.env

#Objective-C & Swift
###gitignore contributors: remember to update Global/Xcode.gitignore, Objective-C.gitignore & Swift.gitignore

####Build generated
build/
DerivedData/

####Various settings
*.pbxuser
!default.pbxuser
*.mode1v3
!default.mode1v3
*.mode2v3
!default.mode2v3
*.perspectivev3
!default.perspectivev3
xcuserdata/

####Other
*.moved-aside
*.xccheckout
*.xcscmblueprint

####Obj-C/Swift specific
*.hmap
*.ipa
*.dSYM.zip
*.dSYM

###CocoaPods
#
###We recommend against adding the Pods directory to your .gitignore. However
###you should judge for yourself, the pros and cons are mentioned at:
###https://guides.cocoapods.org/using/using-cocoapods.html#should-i-check-the-pods-directory-into-source-control
#
###Pods/

###Carthage
#
###Add this line if you want to avoid checking in source code from Carthage dependencies.
###Carthage/Checkouts

Carthage/Build

###fastlane
#
###It is recommended to not store the screenshots in the git repo. Instead, use fastlane to re-generate the
###screenshots whenever they are needed.
###For more information about the recommended setup visit:
###https://docs.fastlane.tools/best-practices/source-control/#source-control

fastlane/report.xml
fastlane/Preview.html
fastlane/screenshots
fastlane/test_output

###Code Injection
#
###After new code Injection tools there's a generated folder /iOSInjectionProject
###https://github.com/johnno1962/injectionforxcode

iOSInjectionProject/

#C/C++
###Prerequisites
*.d

###Compiled Object files
*.slo
*.lo
*.o
*.obj

###Precompiled Headers
*.gch
*.pch

###Compiled Dynamic libraries
*.so
*.dylib
*.dll

###Fortran module files
*.mod
*.smod

###Compiled Static libraries
*.lai
*.la
*.a
*.lib

###Executables
*.exe
*.out
*.app

#Codeignter

*/config/development
*/logs/log-*.php
!*/logs/index.html
*/cache/*
!*/cache/index.html
!*/cache/.htaccess

user_guide_src/build/*
user_guide_src/cilexer/build/*
user_guide_src/cilexer/dist/*
user_guide_src/cilexer/pycilexer.egg-info/*

###codeigniter 3
application/logs/*
!application/logs/index.html
!application/logs/.htaccess
/vendor/

#Android

###Built application files
*.apk
*.ap_

###Files for the ART/Dalvik VM
*.dex

###Java class files
*.class

###Generated files
bin/
gen/
out/

###Gradle files
.gradle/
build/

###Local configuration file (sdk path, etc)
local.properties

###Proguard folder generated by Eclipse
proguard/

###Log Files
*.log

###Android Studio Navigation editor temp files
.navigation/

###Android Studio captures folder
captures/

###Intellij
*.iml
.idea/workspace.xml
.idea/tasks.xml
.idea/gradle.xml
.idea/dictionaries
.idea/libraries

###Keystore files
*.jks

###External native build folder generated in Android Studio 2.2 and later
.externalNativeBuild

###Google Services (e.g. APIs or Firebase)
google-services.json

###Freeline
freeline.py
freeline/
freeline_project_description.json

#VSCode
.vscode/
.vscode/*
!.vscode/settings.json
!.vscode/tasks.json
!.vscode/launch.json
!.vscode/extensions.json

#VisualStudio
## Ignore Visual Studio temporary files, build results, and
## files generated by popular Visual Studio add-ons.
##
## Get latest from https://github.com/github/gitignore/blob/master/VisualStudio.gitignore

# User-specific files
*.suo
*.user
*.userosscache
*.sln.docstates

# User-specific files (MonoDevelop/Xamarin Studio)
*.userprefs

# Build results
[Dd]ebug/
[Dd]ebugPublic/
[Rr]elease/
[Rr]eleases/
x64/
x86/
bld/
[Bb]in/
[Oo]bj/
[Ll]og/

# Visual Studio 2015 cache/options directory
.vs/
# Uncomment if you have tasks that create the project's static files in wwwroot
#wwwroot/

# MSTest test Results
[Tt]est[Rr]esult*/
[Bb]uild[Ll]og.*

# NUNIT
*.VisualState.xml
TestResult.xml

# Build Results of an ATL Project
[Dd]ebugPS/
[Rr]eleasePS/
dlldata.c

# Benchmark Results
BenchmarkDotNet.Artifacts/

# .NET Core
project.lock.json
project.fragment.lock.json
artifacts/
**/Properties/launchSettings.json

*_i.c
*_p.c
*_i.h
*.ilk
*.meta
*.obj
*.pch
*.pdb
*.pgc
*.pgd
*.rsp
*.sbr
*.tlb
*.tli
*.tlh
*.tmp
*.tmp_proj
*.log
*.vspscc
*.vssscc
.builds
*.pidb
*.svclog
*.scc

# Chutzpah Test files
_Chutzpah*

# Visual C++ cache files
ipch/
*.aps
*.ncb
*.opendb
*.opensdf
*.sdf
*.cachefile
*.VC.db
*.VC.VC.opendb

# Visual Studio profiler
*.psess
*.vsp
*.vspx
*.sap

# Visual Studio Trace Files
*.e2e

# TFS 2012 Local Workspace
$tf/

# Guidance Automation Toolkit
*.gpState

# ReSharper is a .NET coding add-in
_ReSharper*/
*.[Rr]e[Ss]harper
*.DotSettings.user

# JustCode is a .NET coding add-in
.JustCode

# TeamCity is a build add-in
_TeamCity*

# DotCover is a Code Coverage Tool
*.dotCover

# AxoCover is a Code Coverage Tool
.axoCover/*
!.axoCover/settings.json

# Visual Studio code coverage results
*.coverage
*.coveragexml

# NCrunch
_NCrunch_*
.*crunch*.local.xml
nCrunchTemp_*

# MightyMoose
*.mm.*
AutoTest.Net/

# Web workbench (sass)
.sass-cache/

# Installshield output folder
[Ee]xpress/

# DocProject is a documentation generator add-in
DocProject/buildhelp/
DocProject/Help/*.HxT
DocProject/Help/*.HxC
DocProject/Help/*.hhc
DocProject/Help/*.hhk
DocProject/Help/*.hhp
DocProject/Help/Html2
DocProject/Help/html

# Click-Once directory
publish/

# Publish Web Output
*.[Pp]ublish.xml
*.azurePubxml
# Note: Comment the next line if you want to checkin your web deploy settings,
# but database connection strings (with potential passwords) will be unencrypted
*.pubxml
*.publishproj

# Microsoft Azure Web App publish settings. Comment the next line if you want to
# checkin your Azure Web App publish settings, but sensitive information contained
# in these scripts will be unencrypted
PublishScripts/

# NuGet Packages
*.nupkg
# The packages folder can be ignored because of Package Restore
**/packages/*
# except build/, which is used as an MSBuild target.
!**/packages/build/
# Uncomment if necessary however generally it will be regenerated when needed
#!**/packages/repositories.config
# NuGet v3's project.json files produces more ignorable files
*.nuget.props
*.nuget.targets

# Microsoft Azure Build Output
csx/
*.build.csdef

# Microsoft Azure Emulator
ecf/
rcf/

# Windows Store app package directories and files
AppPackages/
BundleArtifacts/
Package.StoreAssociation.xml
_pkginfo.txt
*.appx

# Visual Studio cache files
# files ending in .cache can be ignored
*.[Cc]ache
# but keep track of directories ending in .cache
!*.[Cc]ache/

# Others
ClientBin/
~$*
*~
*.dbmdl
*.dbproj.schemaview
*.jfm
*.pfx
*.publishsettings
orleans.codegen.cs

# Since there are multiple workflows, uncomment next line to ignore bower_components
# (https://github.com/github/gitignore/pull/1529#issuecomment-104372622)
#bower_components/

# RIA/Silverlight projects
Generated_Code/

# Backup & report files from converting an old project file
# to a newer Visual Studio version. Backup files are not needed,
# because we have git ;-)
_UpgradeReport_Files/
Backup*/
UpgradeLog*.XML
UpgradeLog*.htm

# SQL Server files
*.mdf
*.ldf
*.ndf

# Business Intelligence projects
*.rdl.data
*.bim.layout
*.bim_*.settings

# Microsoft Fakes
FakesAssemblies/

# GhostDoc plugin setting file
*.GhostDoc.xml

# Node.js Tools for Visual Studio
.ntvs_analysis.dat
node_modules/

# Typescript v1 declaration files
typings/

# Visual Studio 6 build log
*.plg

# Visual Studio 6 workspace options file
*.opt

# Visual Studio 6 auto-generated workspace file (contains which files were open etc.)
*.vbw

# Visual Studio LightSwitch build output
**/*.HTMLClient/GeneratedArtifacts
**/*.DesktopClient/GeneratedArtifacts
**/*.DesktopClient/ModelManifest.xml
**/*.Server/GeneratedArtifacts
**/*.Server/ModelManifest.xml
_Pvt_Extensions

# Paket dependency manager
.paket/paket.exe
paket-files/

# FAKE - F# Make
.fake/

# JetBrains Rider
.idea/
*.sln.iml

# CodeRush
.cr/

# Python Tools for Visual Studio (PTVS)
__pycache__/
*.pyc

# Cake - Uncomment if you are using it
# tools/**
# !tools/packages.config

# Tabs Studio
*.tss

# Telerik's JustMock configuration file
*.jmconfig

# BizTalk build output
*.btp.cs
*.btm.cs
*.odx.cs
*.xsd.cs

# OpenCover UI analysis results
OpenCover/
PS. Github 有一个比较完整的库 https://github.com/github/gitignore
update@2018-03-14: 更新一些 git 在 oh-my-zsh 中的快捷键
g - git
gst - git status
gl - git pull
gup - git pull --rebase
gp - git push
gd - git diff
gdc - git diff --cached
gdv - git diff -w "$@" | view
gc - git commit -v
gc! - git commit -v --amend
gca - git commit -v -a
gca! - git commit -v -a --amend
gcmsg - git commit -m
gco - git checkout
gcm - git checkout master
gr - git remote
grv - git remote -v
grmv - git remote rename
grrm - git remote remove
gsetr - git remote set-url
grup - git remote update
grbi - git rebase -i
grbc - git rebase --continue
grba - git rebase --abort
gb - git branch
gba - git branch -a
gcount - git shortlog -sn
gcl - git config --list
gcp - git cherry-pick
glg - git log --stat --max-count=10
glgg - git log --graph --max-count=10
glgga - git log --graph --decorate --all
glo - git log --oneline --decorate --color
glog - git log --oneline --decorate --color --graph
gss - git status -s
ga - git add
gm - git merge
grh - git reset HEAD
grhh - git reset HEAD --hard
gclean - git reset --hard && git clean -dfx
gwc - git whatchanged -p --abbrev-commit --pretty=medium
gsts - git stash show --text
gsta - git stash
gstp - git stash pop
gstd - git stash drop
ggpull - git pull origin $(current_branch)
ggpur - git pull --rebase origin $(current_branch)
ggpush - git push origin $(current_branch)
ggpnp - git pull origin $(current_branch) && git push origin $(current_branch)
glp - _git_log_prettily
语言和数据库
开发语言和数据库很多,这里我只介绍一些我用到的。
PHP + Mysql
这个是一个套餐,太流行了,所以,在 macOS 下,不需要手工配置环境的套件自然非常多,比如我将要推荐的这个 mamp,安装完成后,随意切换使用。
http://mamp.info/ 是它的官网,可惜被墙了,大家可以翻墙去看。
这个软件有免费版和收费版,不只是 PHP,mysql,现在包含的东西越来越多,而且还自带了版本切换的功能,着实很方便。
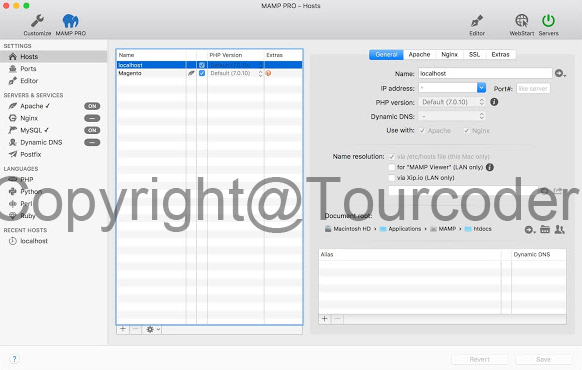
如图,安装好后,配置也非常简单,点几下即可。
PHP
当然我们也可以通过上篇提到的 Homebrew 来安装 PHP,我们选择安装最新的 PHP7,其实在 macOS 中是自带 PHP 的,在终端中输入 php -v 可以看到自带的 PHP 版本信息。
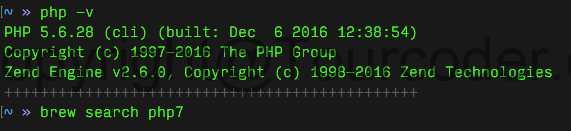
输入 brew search php7,找到要安装的版本,执行安装命令 brew install 你所选择的版本
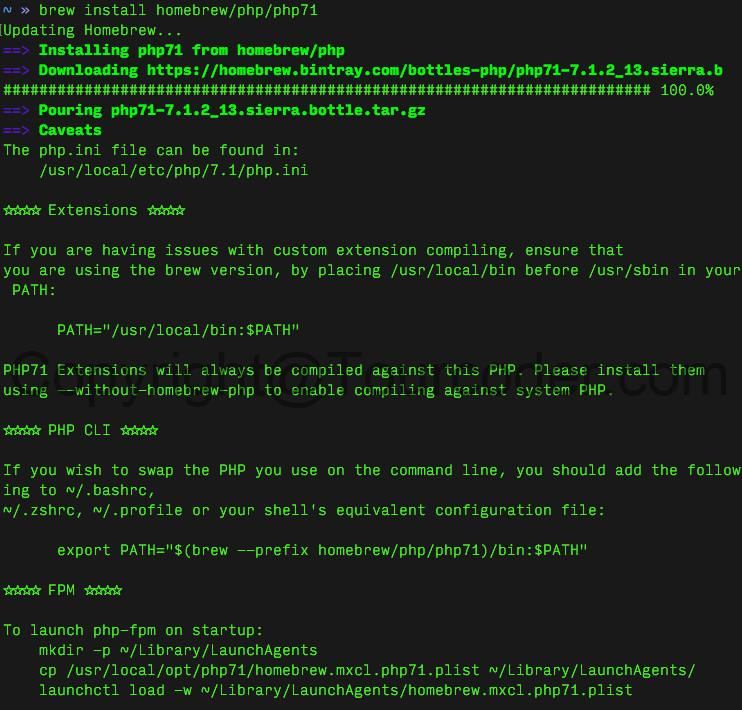
安装完成后,再次输入 php -v,检查版本发现依旧还是旧的版本,看上面的图话,你会知道怎么做,然后再次查看版本

另外我们也可以让 FPM 开机运行

需要注意的是,因为墙的关系,这里安装 PHP 7 会有问题,请自行解决翻墙问题,你也可以去 https://homebrew.bintray.com/bottles-php/ 下载你需要的 PHP 版本,然后将它放入到brew 缓存目录,然后再用安装命令安装
Mysql
Mysql 也可以用同样的方式来安装,在终端中执行 brew install mysql 命令。

在一段等待时间后,即可安装完成。执行 brew services start mysql 命令即可启动 mysql,同样你也可以通过 mysql.server 命令来操作 mysql,比如
mysql.server start 表示启动 mysql
mysql.server stop 表示停止 mysql
更多的使用方法可以通过 mysql.server --help 查看。
想要对数据库操作等,在终端中输入 mysql -uroot 进入 mysql 管理界面。

比如显示当前所有的数据库,则可以用命令 show databases; 更多的 mysql 命令建议去官方网站学习下。你可能注意到我在进入 mysql 的时候是没有使用密码的,那是因为默认 root 没有密码,你可以通过命令给 root 增加密码,命令格式如下
mysqladmin -u root password 'new-password'
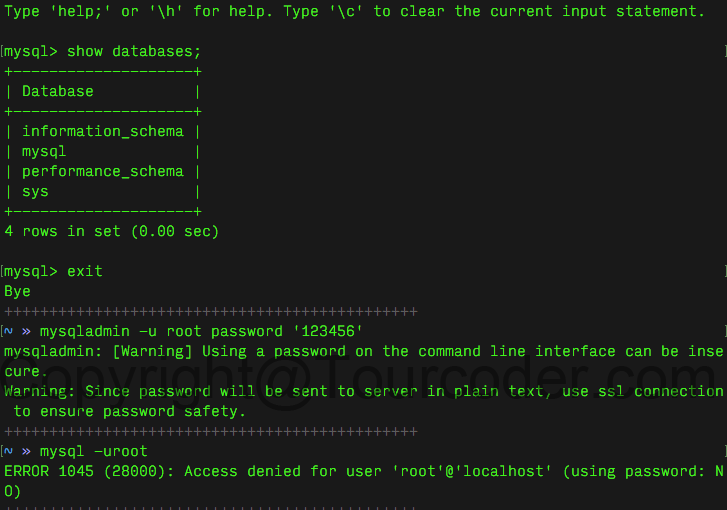
上图我通过命令将 root 的密码改成了 123456,当我再次不用密码登录的时候,就会提示没有登录权限,因为没有密码。
管理 mysql 也有一些图形的工具,更为方便快捷。
mysql 也有 dmg 文件,去官网下载对应的 dmg 文件,安装完成后在系统的控制面板中会有一个 mysql 的选项。
登录命令可以用 /usr/local/mysql/bin/mysql -u root -p,设置密码命令 SET PASSWORD = PASSWORD('your_new_password');,如果去掉路径,则需要添加路径 PATH="$PATH":/usr/local/mysql/bin。
Node.js
Node.js 的安装方式有用安装文件 Pkg 安装,源码安装,Homebrew 安装,也可以通过 NVM 安装,最简单的方法就是去 Node.js 官网下载最新的 pkg 文件直接安装。
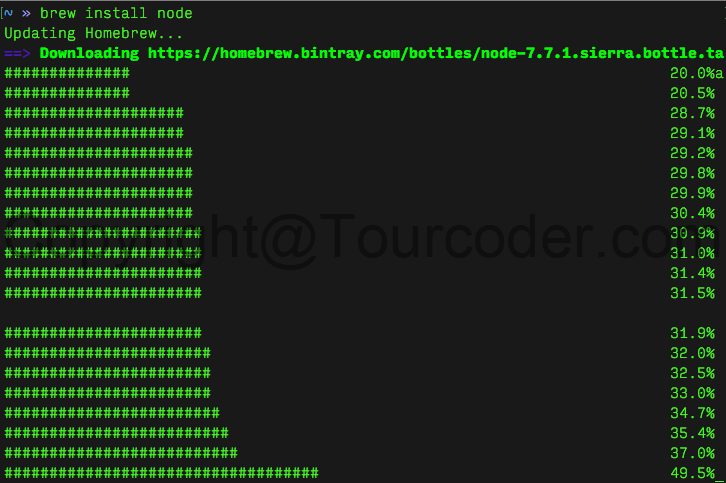
你也可以在终端中输入 brew install node 安装最新稳定版的 Node.js。
其他两种安装方式大同小异,这里就不一一介绍。
安装完成后,你可以在终端中输入 node -v 查看 Node.js 是否正常安装,并且当前所使用的版本,如下图。

NVM
Node.js 发展太快,版本发布也非常快而且多,这时候就需要一个版本管理的东西,NVM 就是这么一个好用的东西,你可以在这里查看到它的安装方式。
curl -o- https://raw.githubusercontent.com/creationix/nvm/v0.33.1/install.sh | bash
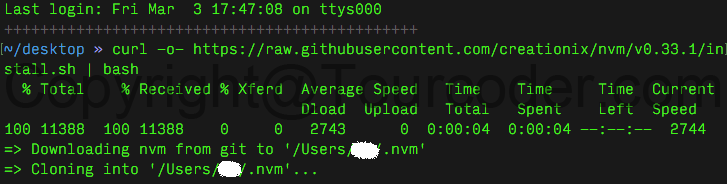
在终端中执行上面的命令,即可安装 nvm,安装位置为 ~/.nvm,安装完成后,会提示你
=> nvm source string already in /Users/tc/.zshrc
=> bash_completion source string already in /Users/tc/.zshrc
=> Close and reopen your terminal to start using nvm or run the following to use it now:
export NVM_DIR="$HOME/.nvm"
[ -s "$NVM_DIR/nvm.sh" ] && \. "$NVM_DIR/nvm.sh"  # This loads nvm
这话告诉你已经自动将 export 一直到结尾的内容添加到 ~/.zshrc,你可用 vi ~/.zshrc 命令查看在该文件的底部是有以上内容,如果没有,可以自行添加,然后重启下终端。
用法
nvm --version - 查看当前 nvm 的版本,也可以通过 command -v nvm 查看当前系统是否安装了 nvm
nvm install 1.0 - 安装 1.0 版本的 Node.js
nvm use 1.0 - 使用 1.0 版本
nvm list - 查看当前已经安装的版本
nvm current - 查看当前使用的版本
nvm run 1.0 app.js - 用指定的版本(1.0)运行程序
rm -rf ~/.nvm - 卸载 nvm
更多的用法,查看 nvm --help。
PS. 还有一些其他的本版管理工具,比如 n,我相对于喜欢 nvm 的原因在于它是一个独立体,而非 n 那样依赖 Node.js。
NPM
NPM 顾名思义,Node.js 的包管理器,它在你安装 Node.js 的时候会被一道安装成功,它主要用来帮你管理 Node.js 项目中用到的包。
常规用法
npm install <package-name>
在本项目中安装一个包,如果加上不同的参数有不用的作用,比如
npm install -g <package-name>
安装一个全局的包
npm install <package-name> --save
安装一个包,并且保存在 package.json 文件中。
npm list [-g]
查看安装了哪些包,加上 -g 表示全局安装的包
npm outdated [-g]
查看哪些包过时了
npm update [<package-name>]
升级所有的包,带上包的名字,表示升级该名字的包
npm uninstall <package-name>
卸载某一个包。
其他更多的用法,可以通过 npm help 命令查看。
PS. facebook 也推出了另外一个新的包管理器 Yarn,有兴趣的话,你可以自行研究一下。
Go
Go 是由 Google 推出的一门语言,在终端中输入命令 brew install golang 即可完成安装。
安装完成后,输入 go version 查看下当前安装的版本,另外配置下环境变量,我用的是 oh my zsh,所以,在 .zshrc 中增加
export GOPATH=$HOME/go-folder # 这里是你的项目
export GOROOT=/usr/local/opt/go/libexec
export PATH=$PATH:$GOPATH/bin
export PATH=$PATH:$GOROOT/bin
其他更多 go 的用法,请去官网。
Ruby
Ruby 是 macOS 自带的,一度我以为它是能成为 Apple 公司开发专用的语言,有点想太多,因为是自带么,所以,也没有什么需要说的。

值得一提的是,因为墙的关系,建议各位替换下 Ruby 的包管理器 RubyGems 镜像,使用 Ruby China 的源,地址是 http://gems.ruby-china.org/ 那里也写明了使用方法。
在 ruby 安装的时候,现在阶段建议用 RVM 这个管理工具来,先安装 RVM,因为 macOS 自带了 ruby,可以直接用 curl -sSL https://get.rvm.io | bash -s stable --ruby 安装,安装好后加载一下,即运行 source ~/.rvm/scripts/rvm,也可以用其他方式安装,具体看 RVM 官网。
然后安装 ruby
rvm list known // 查看有哪些版本
rvm install 版本号 // 安装指定的版本
rvm use 版本号  --default // 使用指定的版本为默认
Java
在终端中输入 java -version 查看是否安装了 java
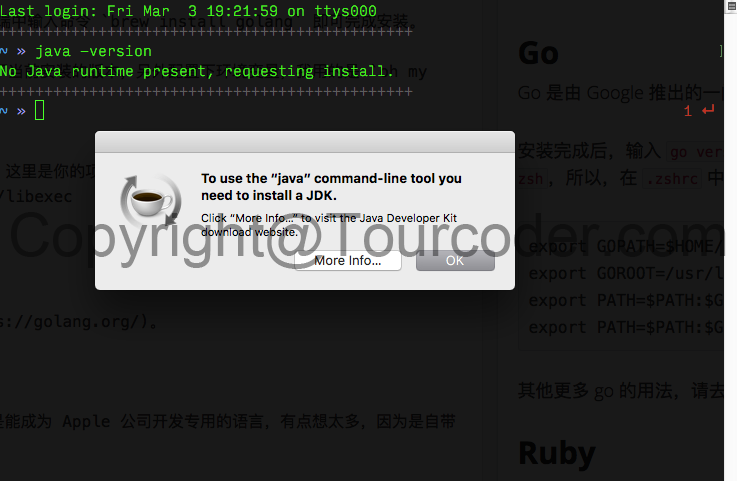
如果已经安装,则会显示当前 java 版本,没有安装,则如上图,弹出窗口,这是你可以点击更新信息,去 oracle 站点下载。
Python
同样也是 macOS 自带,也不做解释。
C++
安装了之前一篇说到的 Xcode command line tools,即可使用 C++,查看它的版本 c++ --version。
Mongodb
数据库,依旧可以通过 Homebrew 来安装,在终端中执行命令 brew install mongodb 安装。
在 / 目录下,创建 data/db 目录用来保存 mongodb 的数据,如果不创建,会报错。
卸载步骤
# 查看 mongodb 是否在 launch/startup list 中
launchctl list | grep mongo

# 从 launch/startup 中移除 mongodb
launchctl remove homebrew.mxcl.mongodb

# 杀掉 mongodb 的进程
pkill -f mongod

# 通过 homebrew 卸载
brew uninstall mongodb

#  不放心的话,进入 /usr/local/bin/ 查看
mongodb 也可以用命令行来操作,也可以用图形工具管理,命令工具等可以去官网查看。
Nginx
运行环境,依旧可以通过 Homebrew 安装。
上面是我在我的 macOS 上配置的开发语言环境和数据库。
常规软件
updated@2017-10-11 该部分内容已经有更详细的内容,具体点这里。
update@2017-10-23 : 开启 macOS 原生对 NTFS 的写入
macOS 一直让我不爽的一点是对 ntfs 默认只开启了读取功能,并没有开启写入功能,之前也买了一款支持 NTFS 写入的软件,但因为电脑设备较多,又懒得再买授权,也不想使用盗版,索性就研究了下,开启原生支持 NTFS 的写入功能。
比如我有一个外置 U 盘,名字是 Tour Coder,格式为 ntfs,我想开启对它的读取,步骤如下
-
打开终端
-
在终端中输入命令
sudo vi /etc/fstab,编辑这个文件,写入如下内容LABEL=Tour\040Coder none ntfs rw,auto,nobrowse解释:磁盘名字之间有空格的话,用\040代替。 -
就这样,该 u 盘就可以写入了。
当你重新插入 U 盘,你会发现该 U 盘并不在桌面上显示,此时,你可以在 Finder->Go to Folder 中输入 /Volumes,你就会看到你的 U 盘。
当然,你也可以把它通过快捷方式的形式关联到桌面来,比如刚才的 sudo ln -s /volumes/Tour\ Coder ~/Desktop/Tour\ Coder,你就会发现你的电脑桌面有了一个快捷方式。
resetDNS
在终端中输入
sudo killall -HUP mDNSResponder;say DNS cache has been flushed
即可。
显示完整的地址栏
在终端中输入
defaults write com.apple.finder _FXShowPosixPathInTitle -bool YES
取消输入将 YES 更改成 NO 即可。如果想快速获取一个文件夹的路经,直接将该文件夹拖入终端即可。
macOS 下隐藏文件
macOS 下 chflags hidden filename 可以隐藏文件,而 chflags nohidden filename 则可以取消隐藏。
取消 macOS 的固件密码
取消 macOS 的固件密码 https://support.apple.com/zh-cn/HT204455
下载旧版本的 macOS
下载旧版 macOS 系统的地址 https://support.apple.com/zh-cn/HT211683
Apple 设备的小知识点
一些 Apple 设备的知识点: D 开头成都富士康 / F 开头郑州富士康 / C 开头深圳富士康 / GO 开头上海和硕 / M 零售 / n 官换 / f 官翻 / 3 演示 / cha 国行 / dna 德版 / zpa 港版 / lla 美版 / taa 台版 / kha 韩版 / ja 日版